

Surpisingly - you need very few ingredients. Just patience and good measuring skills. Recipe yields 40, but since I know if I made 40 bagels I would eat them all, I decided to cut the recipe into fourths and make 10.
Baking ingredients:
- 1 3/4 cup organic bread flour
- 1/2 cup self-rising flour
- 1 t dry yeast
- 1 1/8 t brown sugar
- 3/4 t salt
- 1 1/2 t olive oil
Cooking liquid ingredients:
- 1 t molasses
- 1 t baking powder
 |
| Olive oil, self-rising flour, bread flour, salt, molasses, brown sugar, yeast, baking powder! That's it! |
Here's the loverly recipe in the book. The picture they took makes my mouth water just looking at it! There are a lot of steps. But 100% WORTH IT.

1. First - you want to get your yeast activated. You need to do a slight math job since you're taking some of your dry ingredients to get the yeast going. To activate the yeast, you'll need 1/4 cup and 2 tablespoons of your bread flour, 1 1/8 t brown sugar, and 3/4 cup of warm water and pour into a bowl.

2. Add the warm water and whisk until the yeast is throughly dissolved. Set aside for 10-15 minutes to bubble away.
 |
| Do your thing yeast! |
3. In a seperate bowl you add the remaining of your dry ingredients. The rest of the bread flour, the self-rising flour, and salt.

4. When your yeast is ready to mix in, take your hand mixer or if your lucky, your KitchenAid mixer and mix until you have a well formed dough ball.

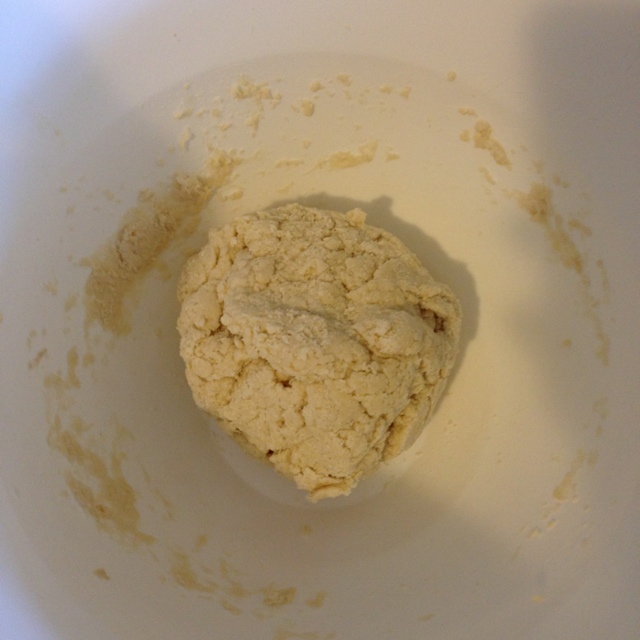
5. Remove your dough ball and move to a floured surface. You'll want to flour your hands and knead the dough until it's nice and smooth.

6. Take your bowl and lightly oil it. I just put a bit of olive oil on a paper towel and ran it along the bottom. PRO TIP: the recipe says to place an oiled plastic wrap or towel on top before you put it in the fridge. I put a towel on top, but did not oil it. DON'T FORGET TO (lightly) OIL THE TOP TOO!
Place in the fridge and let it rise over night.
 |
| See ya in the morning! |
~One night in the fridge later~
7. Remove the dough from the fridge. The dough should have doubled if not tripled in size. The bagel dough has the best yeasty smell at this point - definitely had converted my kitchen into a bakery, or at least fool people.
This is where I realized I should have oiled the top. There was a centimeter thick skin around the dough ball that I had to remove, which in the end, made my bagels slightly smaller.
 |
| My, my, haven't you gotten big! |
8. Cut the dough in half, and then in half again, and then in half again. This made enough dough for 8 bagels.

7. Take each of your smaller dough balls and roll into sausage-sized shaped tubes. Create a ring, leaving a large enough hole for the bagel. You really have to pinch the ends together, or else they will come undone in the cooking process (see step 10).
Cover your bagels with a towel and let rise for another 10-15 minutes.
 |
| They look like cheerios, tbh |
8. While the bagels are resting, bring a large pot to boil and pre-heat your oven to 425°F. Add the molasses and baking powder to the water and whisk until all dissolved.

9. Once the bagels are done resting. Drop 2-3 bagels into the boiling water. Do not overcrowd, because the bagels will double in size. Cook on each side for 2-3 minutes.

10. Flip after 2-3 minutes. I used chopsticks to flip. When the bagels are ready to come out of the water. Use a slotted spoon to remove. I laid my bagels on paper towel to catch the access water.
11. Once all the bagels have been cooked. Place them on a floured baking sheet. I used olive oil, and brushed the tops of them gently. On four of them I just crushed salt on top and on the remaining four I sprinkled some leftover toasted sesame seeds that I had in my pantry.
12. Place the bagels in the oven and bake for 10-15 minutes. PRO TIP: While the recipe says 10-15 minutes, I like my bagels to have a nice golden brown somewhat hard crust. I kept my bagels in the oven for 18 minutes, and well... let me tell you. THEY WERE PERFECT!
 |
| This was also when the seams broke. Oh well. |
11. Once all the bagels have been cooked. Place them on a floured baking sheet. I used olive oil, and brushed the tops of them gently. On four of them I just crushed salt on top and on the remaining four I sprinkled some leftover toasted sesame seeds that I had in my pantry.
 |
| So far, so good! |
12. Place the bagels in the oven and bake for 10-15 minutes. PRO TIP: While the recipe says 10-15 minutes, I like my bagels to have a nice golden brown somewhat hard crust. I kept my bagels in the oven for 18 minutes, and well... let me tell you. THEY WERE PERFECT!
 |
| See, I can't make that up! Perfection. |
 |
| All together now |
 |
| So soft and fluffy on the inside. Ate these with vegan cream cheese. |
The final bagels were warm, soft (and completely cooked) on the inside. They brought so many memories of my favorite bagel place in Beverly Hills and now I think I can give them a run for their money. The crust had the perfect crunch, the insides were so warm and soft. UGH I COULD GO ON AND ON AND ON BUT I WON'T! Unless you talk to me in person, then I'll talk your ear off.
I think I'll start experimenting with more flavors and add-ons. Maybe dried blueberries or different nuts and seeds, the sky is the limit now that I know the basics.
Cheers,
Kate
No comments:
Post a Comment